So being a bit of an audio nut with a background in the audio area, I decided to look at upgrading the system.
The Sound
Even with just the woofers and midrange done there is a definitely improvement in sound quality especially in the rear seat area with the full range instead of the mid range.I have also installed an aftermarket DVD/GPS etc head unit which has a much better top end than the factory unit. More to come on that soon
After installing the crossovers the sound improved again because of the 12db per octave slope compared to 3db with the factory setup.
As others have noted; the HK Door Amps are excellent and provide plenty of power. When I turned the system up to about 8 it was putting out 120 DB and crystal clear :)
A bit of effort has gone into this but I consider it well worthwhile!
Drivers
The first stop was the excellent information on the Stockholm Views Website, this gave me a great starting point.It was pretty much impossible to obtain the same drivers as the ones used by Stockholm Views so after much research I came up with the following alternatives
Door Woofers Silver Flute 6.5" woofer with a frame diameter of 167mm they are a perfect fit in the LR mount.
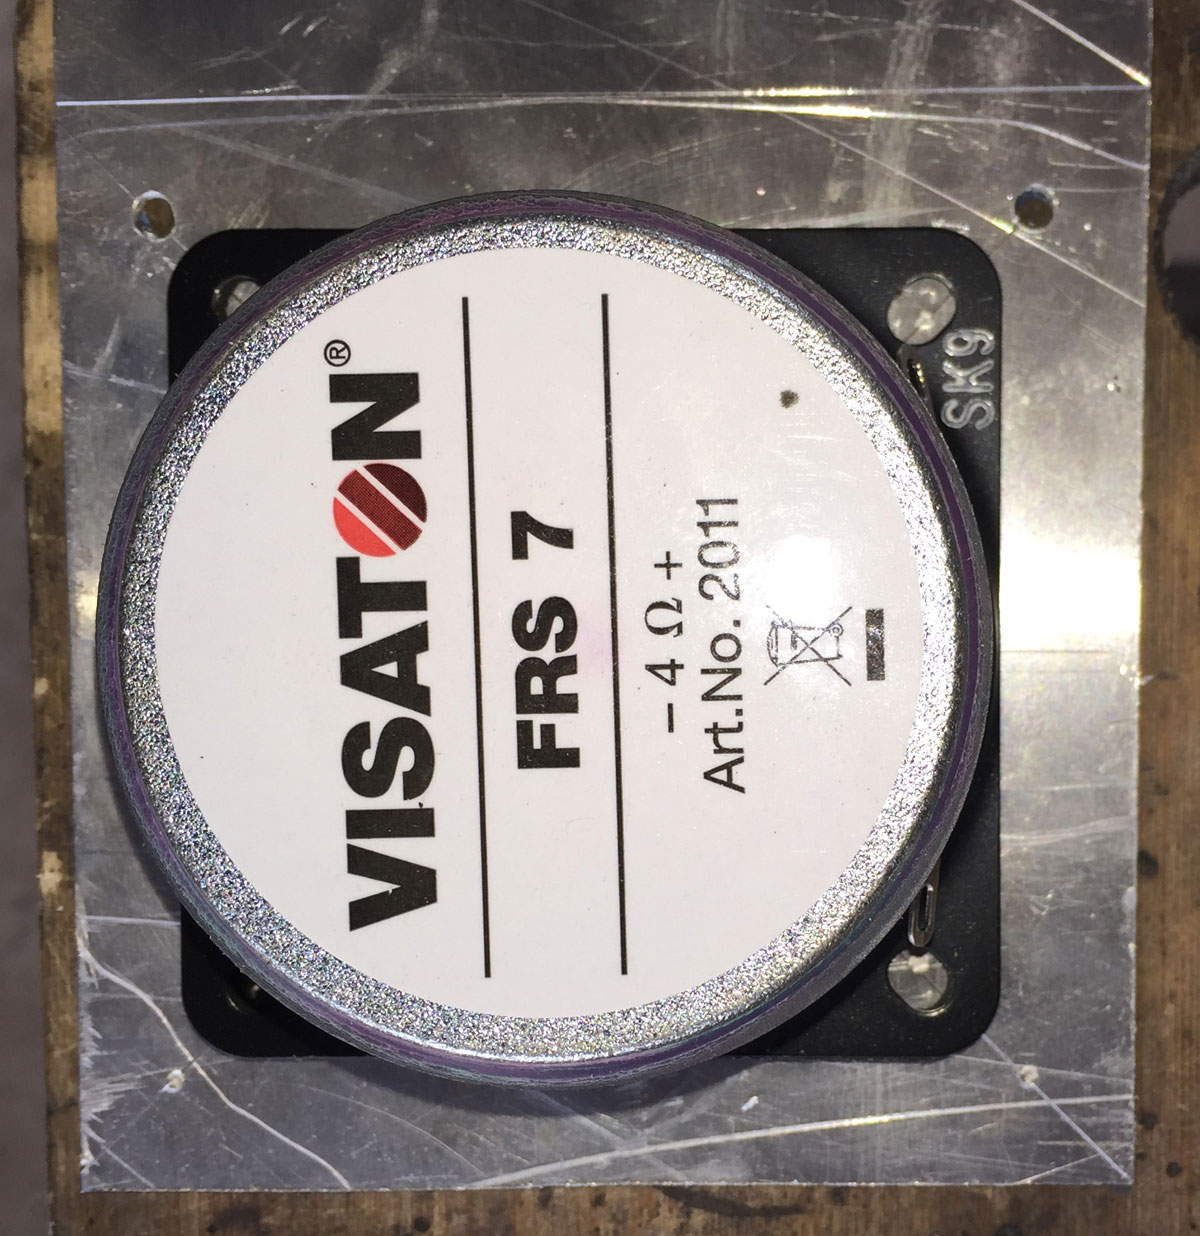
Door Midrange Visaton FRS7 2.5" Full Range speaker These are a little smaller than the very odd size LR use, so it was necessary to make an adaptor plate for them.
Door Tweeters Visaton CP13 Tweeter An excellent dome tweeter with a swivel mount. However after listening to the factory tweeters I decided to stick with them
Current Drivers
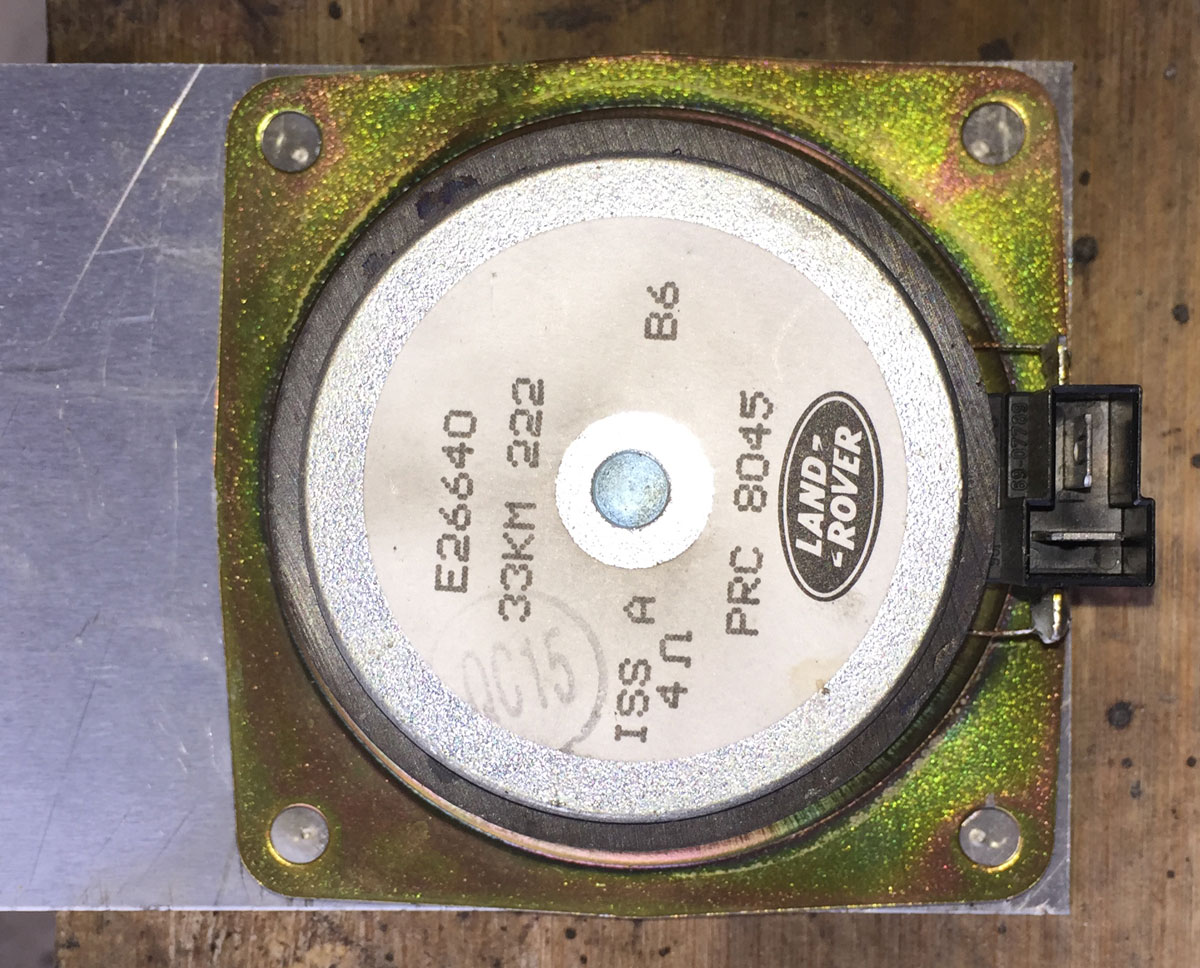
Upon investigating my speakers I found that three of the four mid speakers had warped cones and that the woofer in the drivers door was seized!As well the suspension on the 10" subwoofer, which the early models use, had totally disintegrated. This appears to be a dual coil 4 ohm speaker which once again is a very odd size.
Fitting the new woofers is pretty straightforward, the only things I did differently were;
- I retained the original polarity used by LR. I noticed that the polarity as tested was reversed compared to the markings on the woofer
I suspect that the crossover used by HK is a 2nd order which means the polarity of one of the drivers needs to be reversed to maintain phase. - I used small nuts and bolts with a dab of threadlocker on them instead of self tappers to hold the drivers to the LR mounts, there is a lot of vibration there!
- I soldered standard 2 way Auto Electrical connectors to the speakers to connect to the door harness

Woofer fitted to LR Door Mount. |
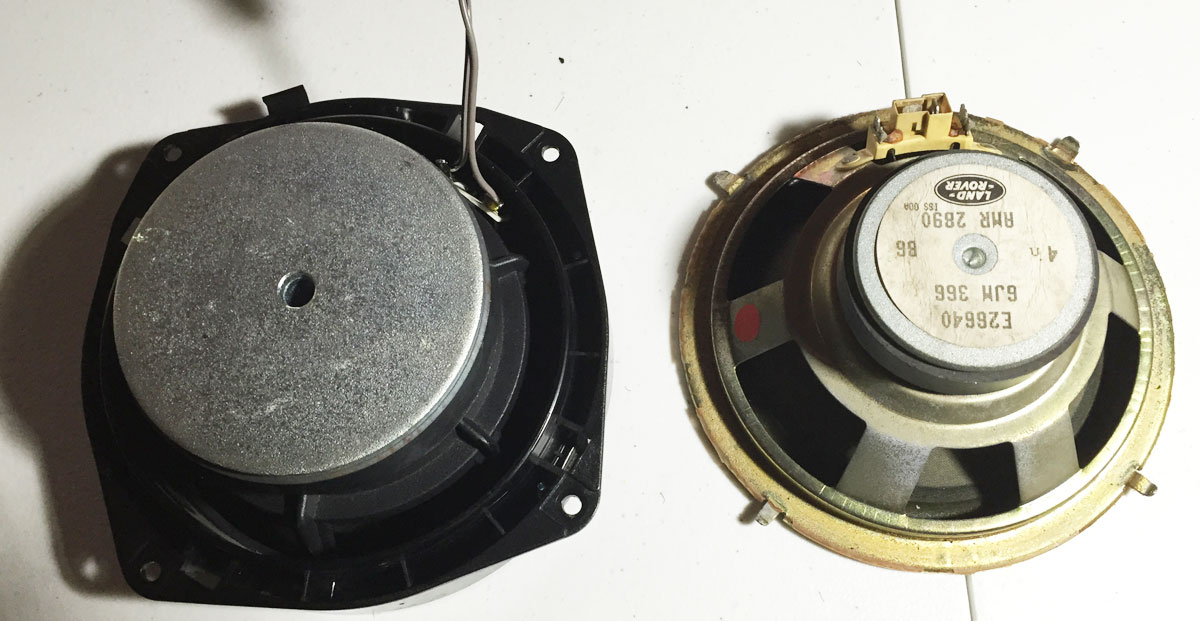
The rear of the two woofers for comparison of the magnet size. |
Mid Range
The mid range presented a bit more of a challenge. I had some 1.5 mm aluminium around so I decided to use that to make an adaptor plate, 2mm would be a little easier to work with.
Lay original LR midrange on top of the aluminium and use centre punch to mark the four holes and mark the edge of the speaker with a scribe. |
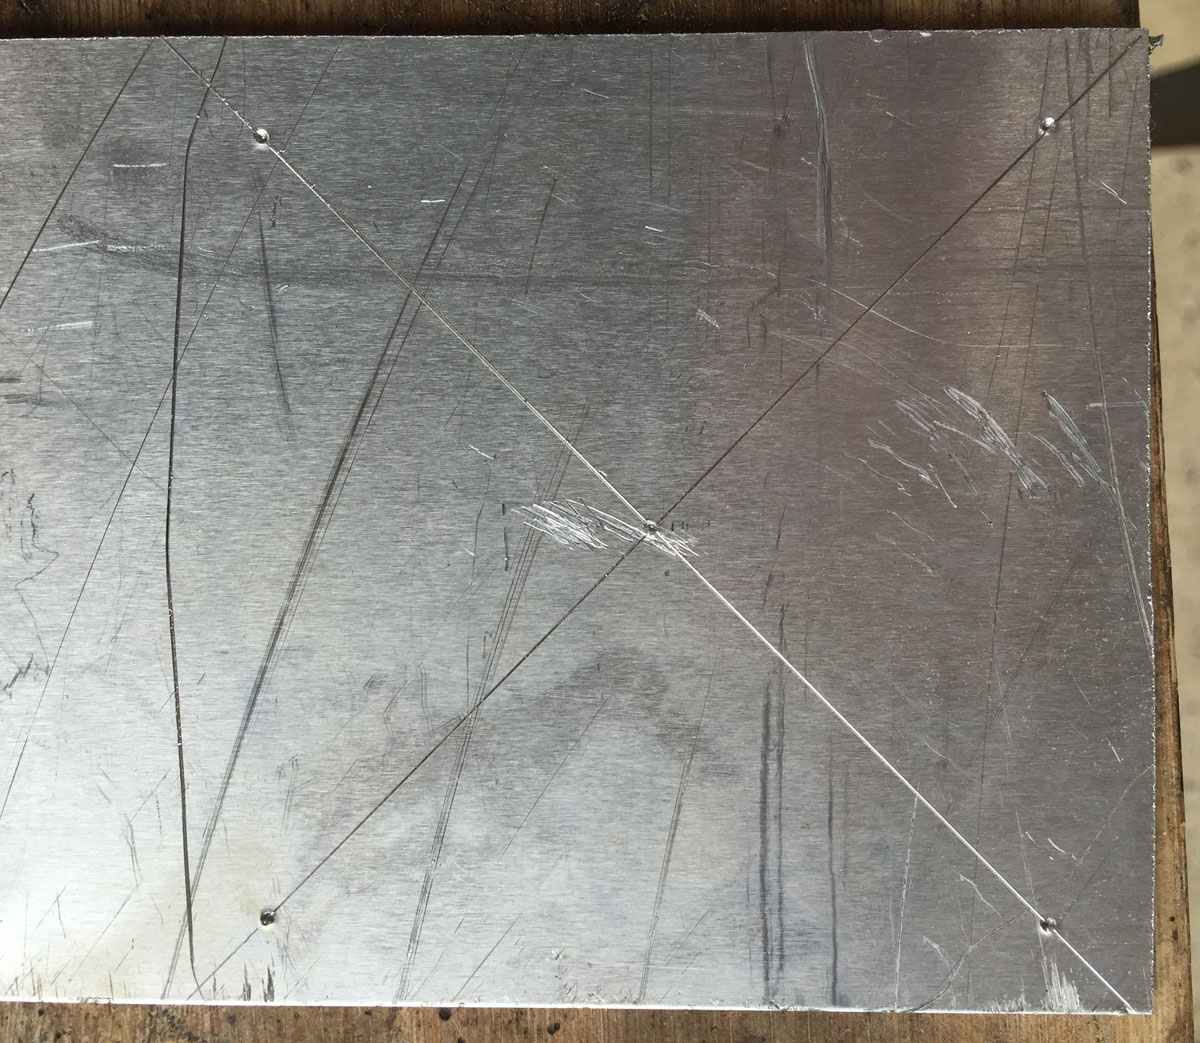
Use a ruler and scribe to join the diagonals and find the centre of the speaker position. |
Lay the new speaker on the template and use a centre punch to mark the position of the mounting holes. |
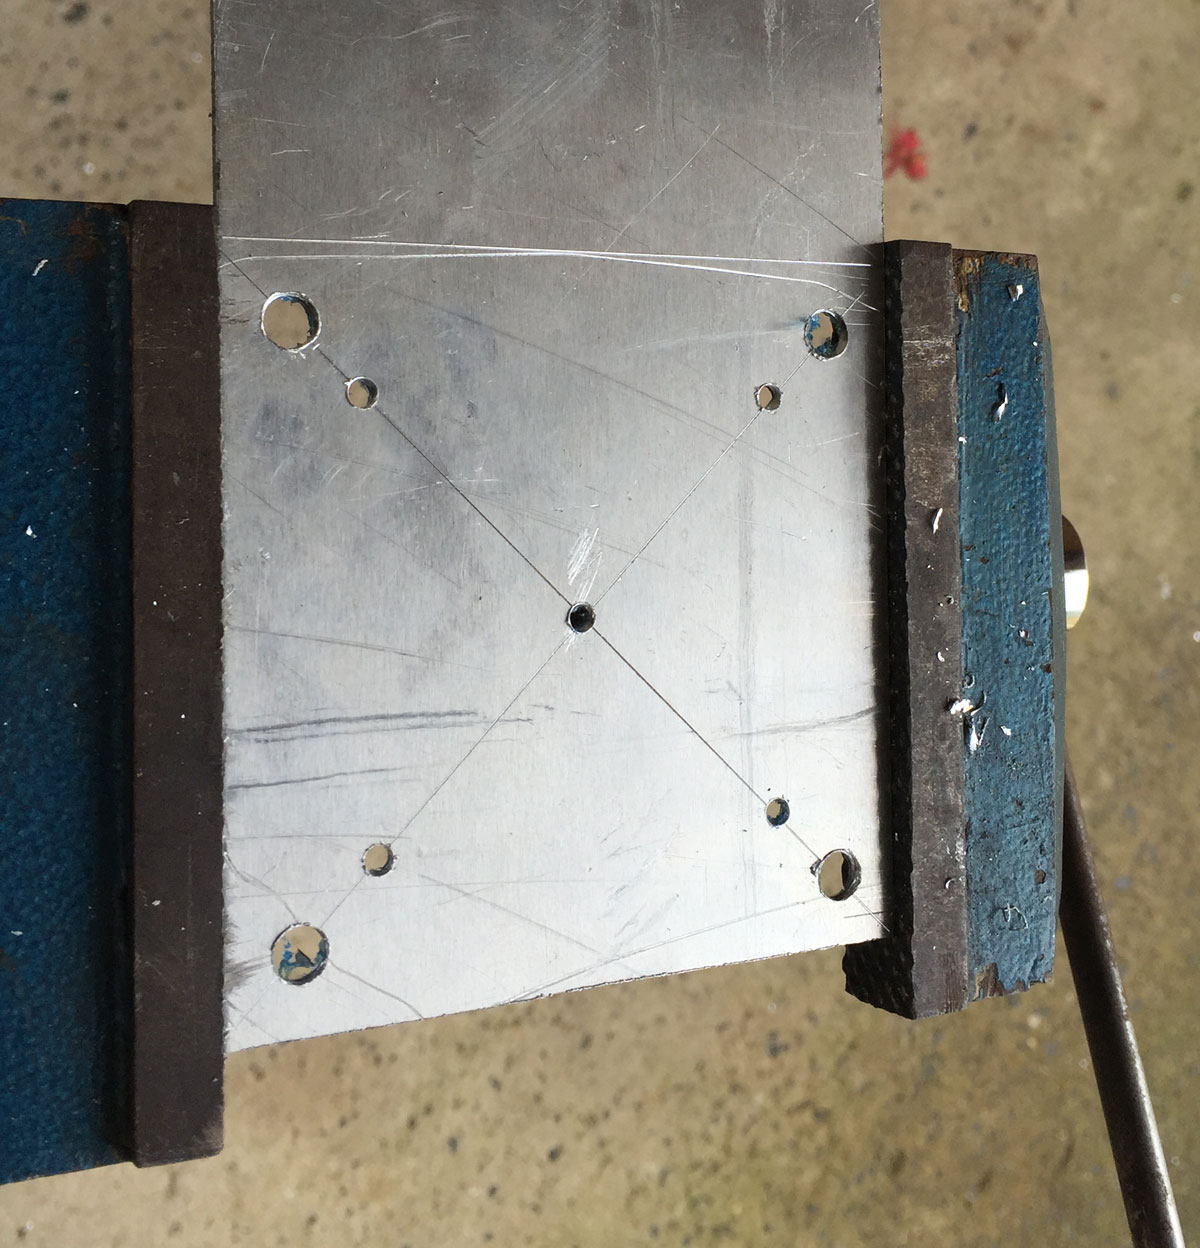
Drill 6mm (1/4") holes in the four outer marks and 3mm (1/8") holes in the inner marks and 3mm in the centre to start the holesaw. |
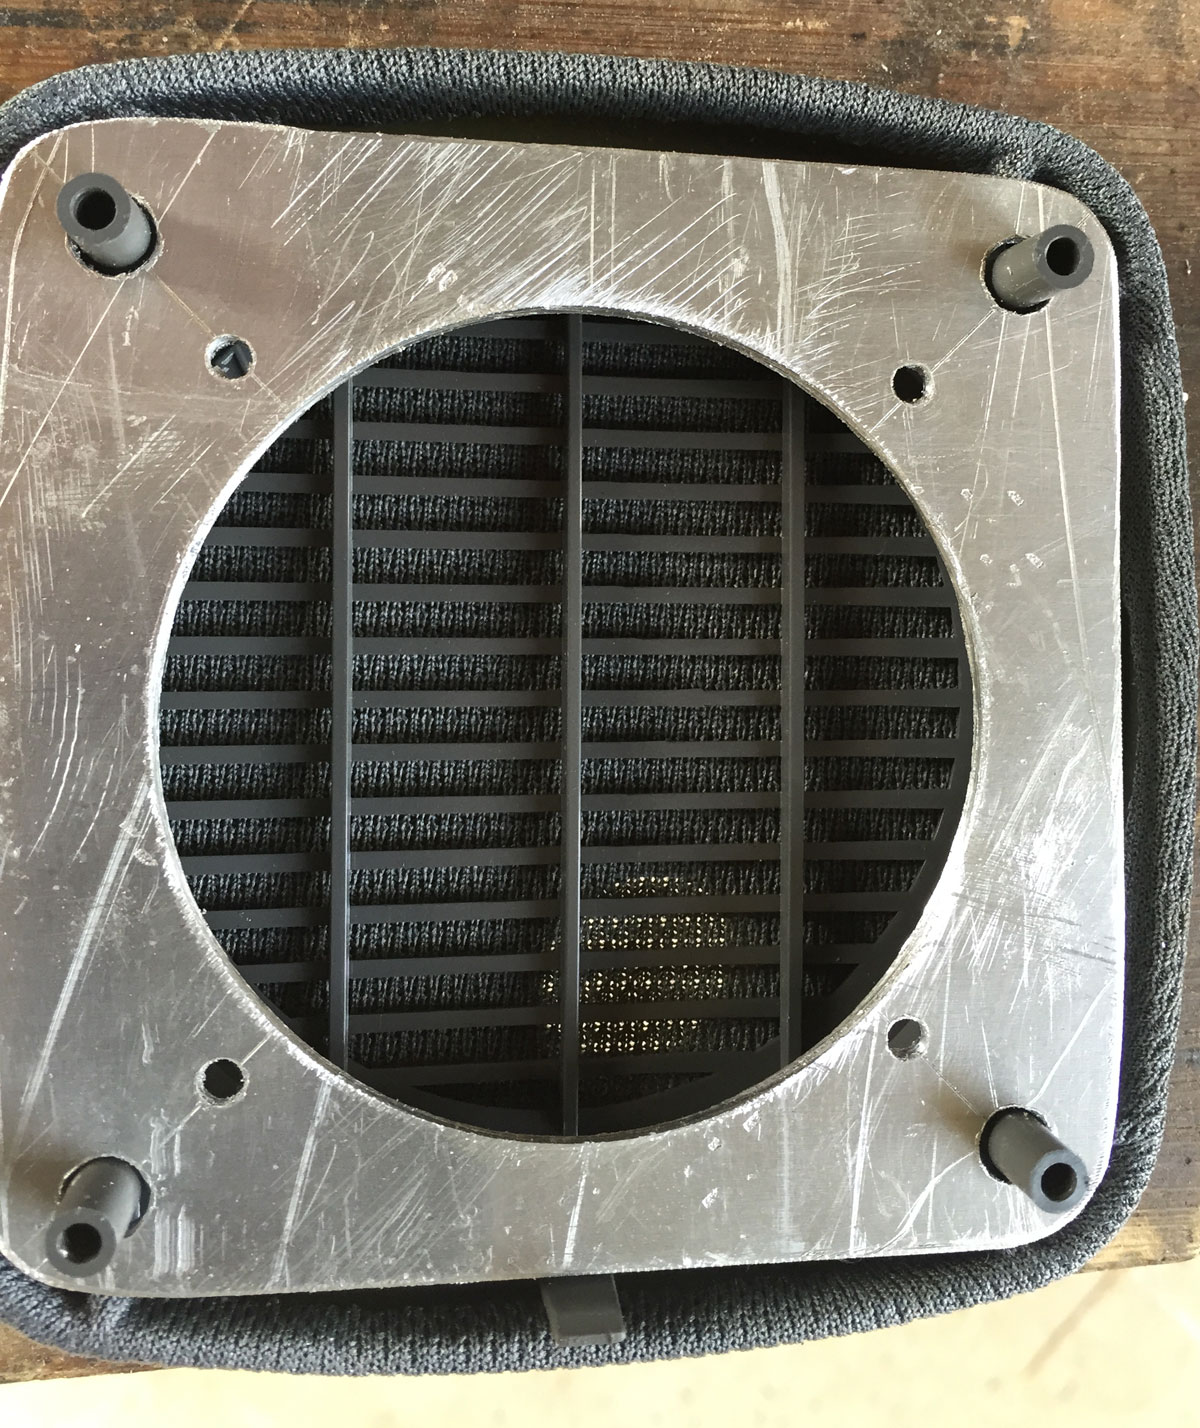
Drill the centre hole out with a holesaw, cut the adaptor off at the length mark and round off the corners. This shows the adaptor in position on the speaker grill with clearance all around so it sits in properly. |
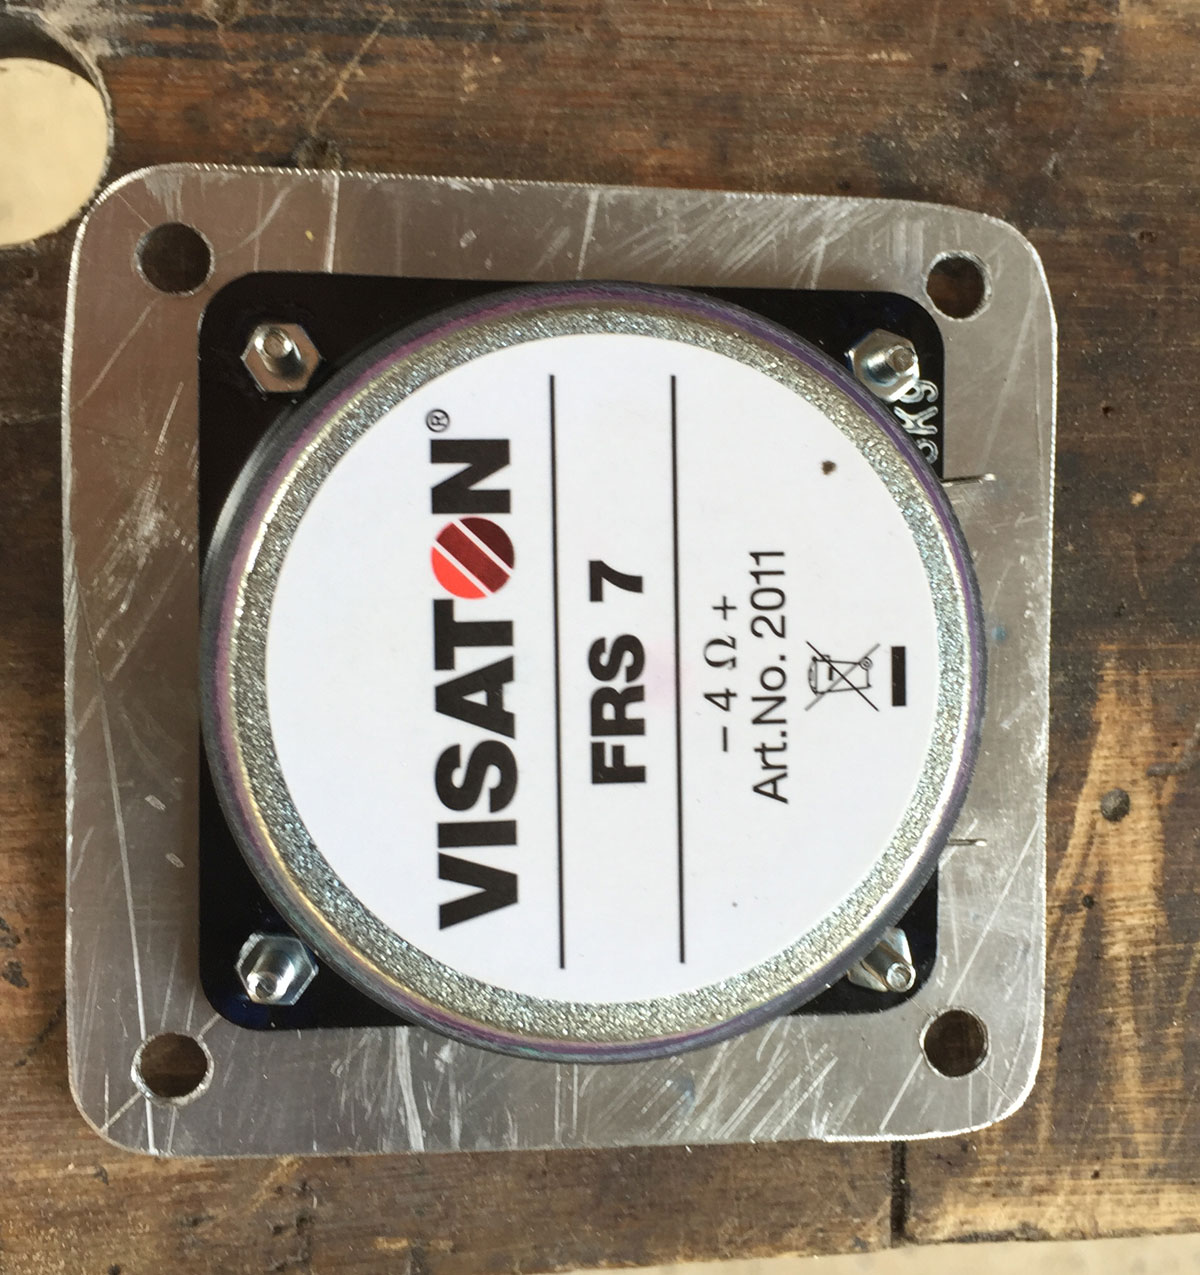
The adaptor with the new speaker bolted on. Use some threadlocker on the bolts so they don't vibrate loose |
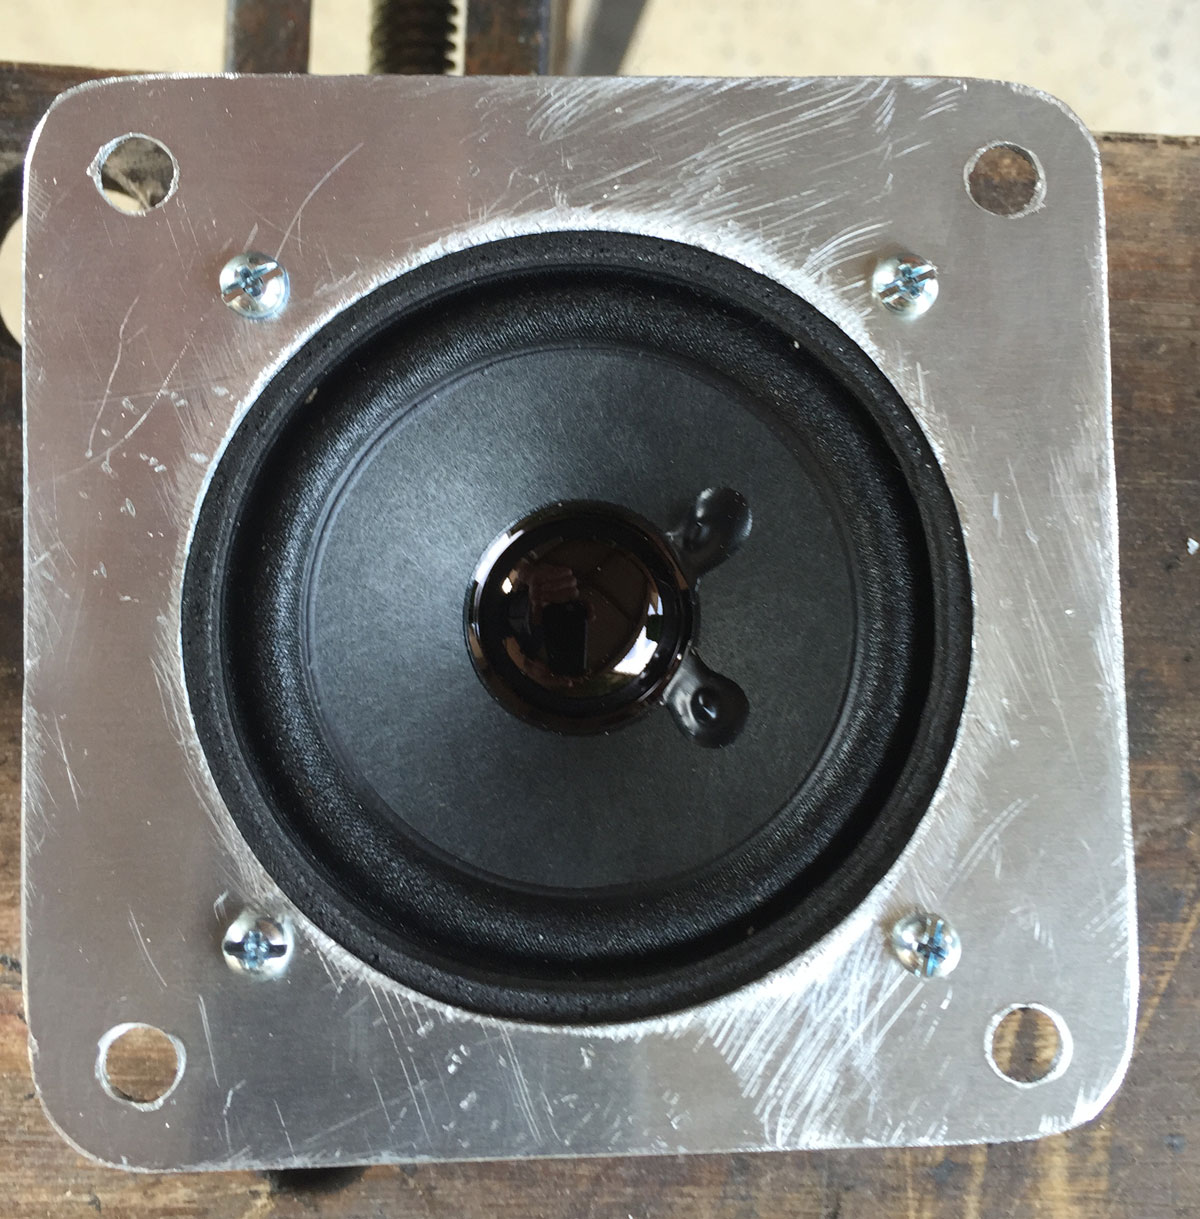
A front view of the mounted speaker. |
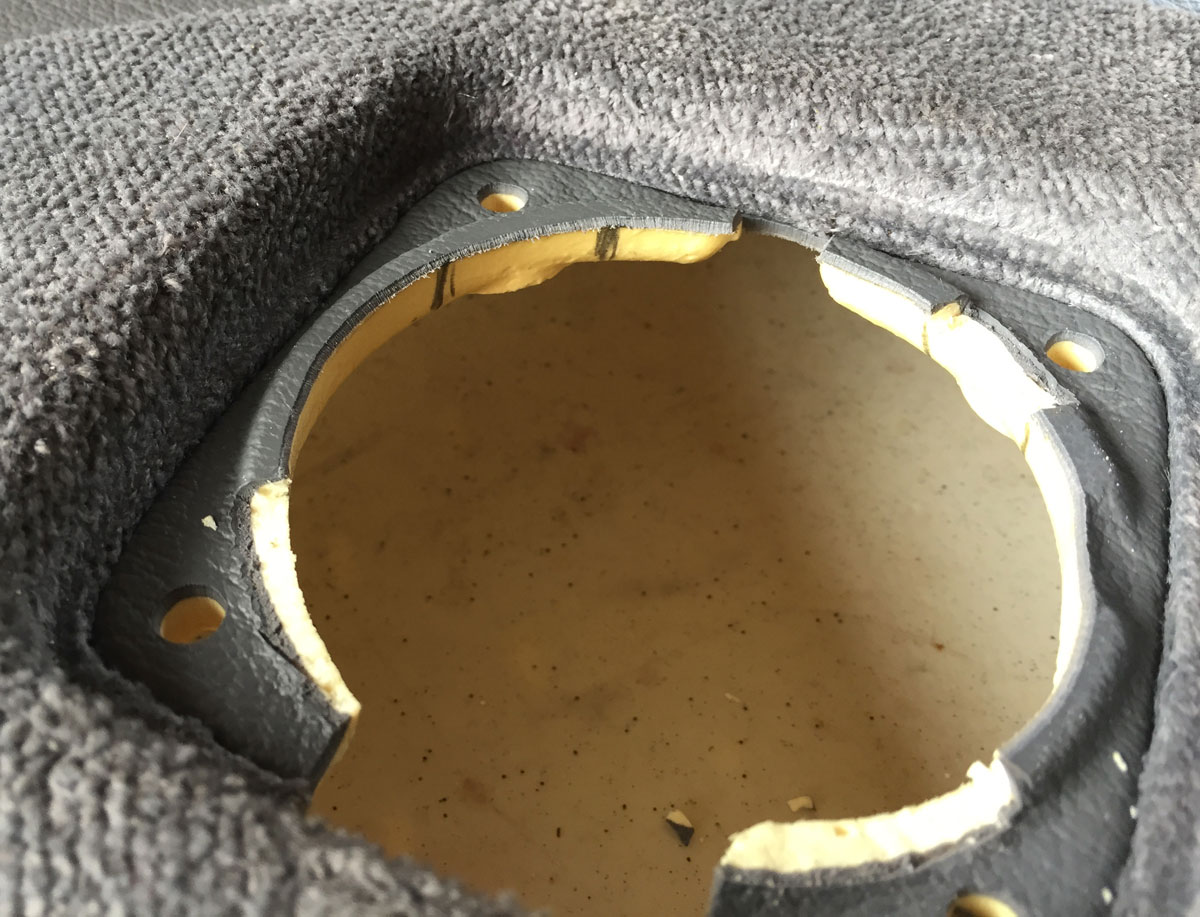
The ridge on the door under the grill needs to be removed in 4 spots to clear the frame of the new speakers. I used a very sharp wood chisel to do this |
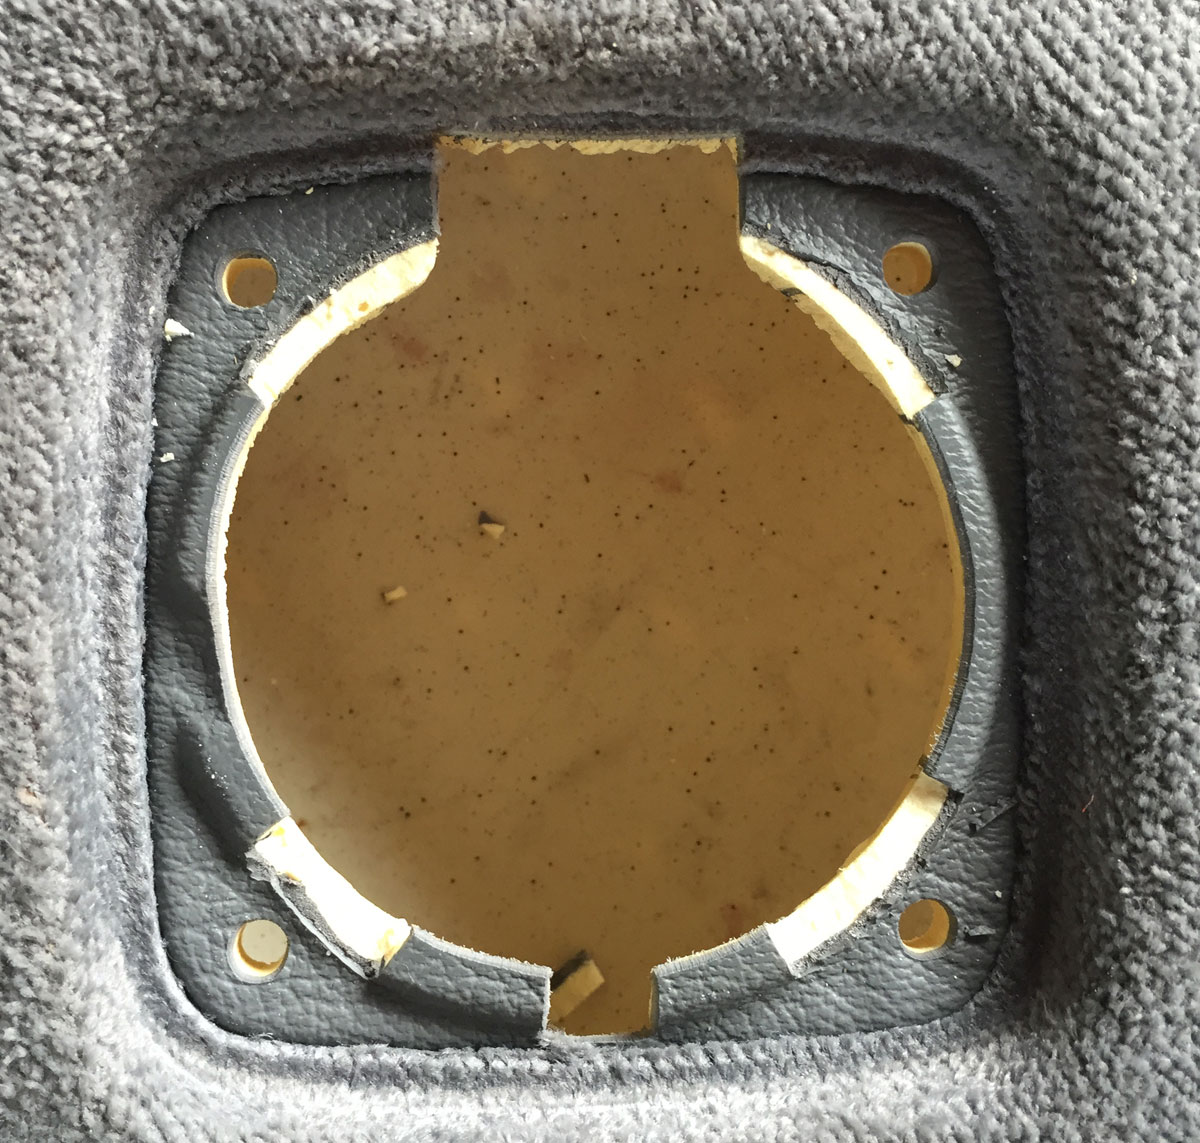
Another view of the door card underneath the speaker grill. |
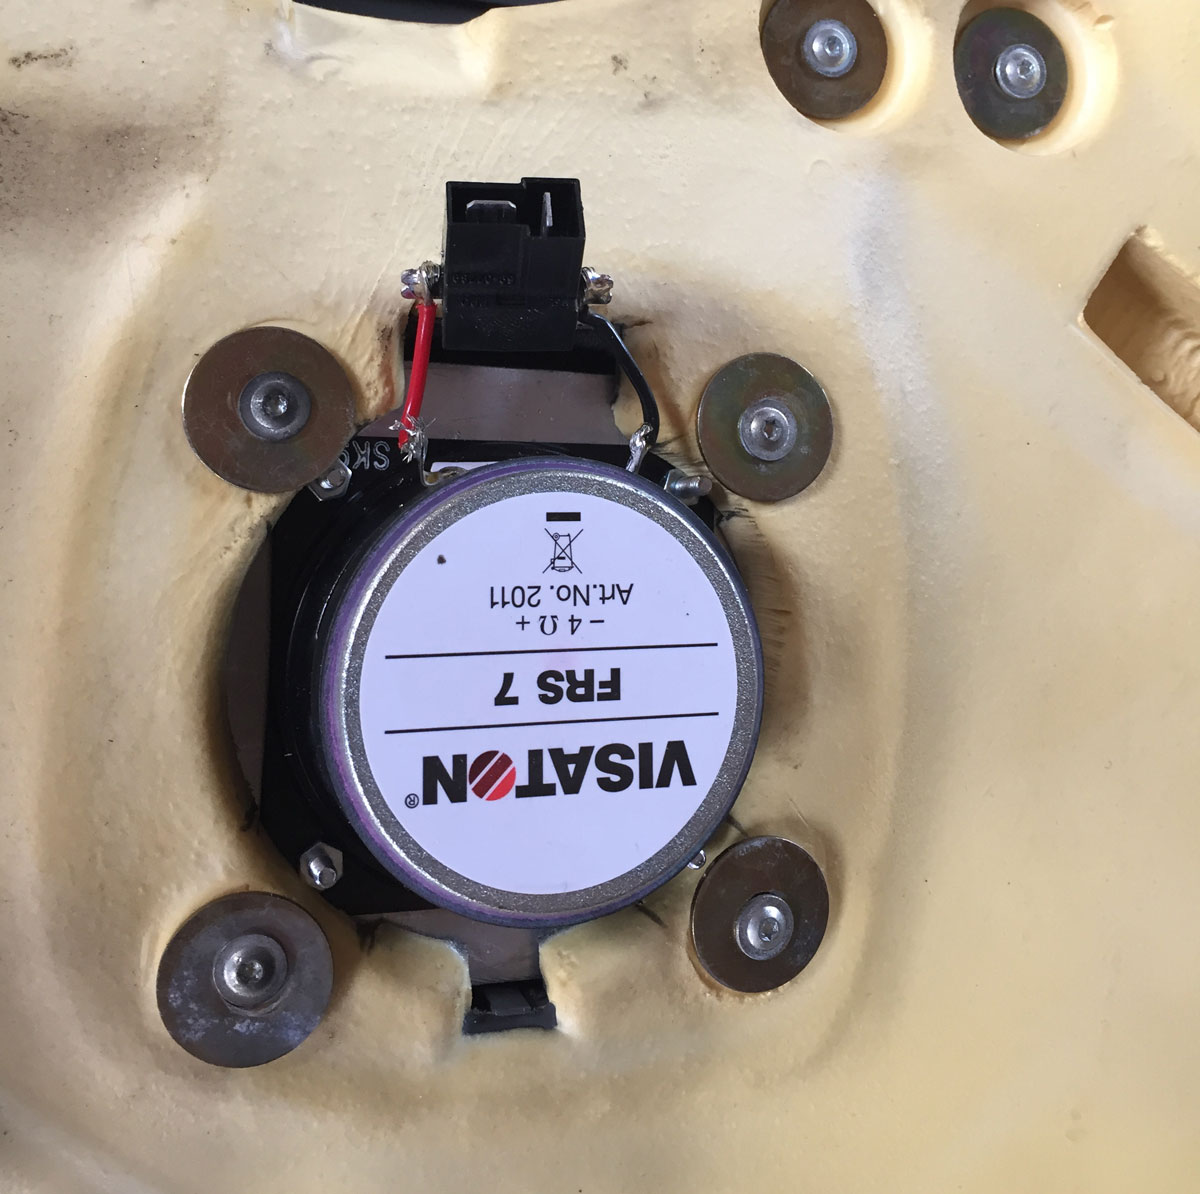
The speaker in position on the door. Note I reused the connector from the original LR Speakers. |
Tweeters
Once I listened to it and looked at the options I have decided stick with the factory tweeters.I am pretty sure that are an Audax tweeter and these are well respected in the Audio world.
Audax Tweeter "The flangeless version was used in millions of auto sound coax systems"
The Visaton CP13 tweeters will fit in the LR mounts quite nicely, I planned a 32mm step drill to make the initial hole and then used a half-round file to take the hole out to the required 34mm
In the end all I had to do was remove the capacitor which is in series with the original tweeter and I maintained the factory look!
Crossovers
The tweeters suggest a 2nd order crossover (12 DB / Octave) at 6K and that also looks like a good point to cross over the full range FRS7's.Using the crossover designer at DIY Audio gave me the components I needed for a 2nd Order Linkwitz-Riley crossover
Another consideration is that the FRS7 are 2DB more efficient than the CP13 tweeters so I used the website above to get the values for an attenuator
Now that I have decided to stick with the factory tweeters an attenuator is not necessary but I left the notes here for reference.
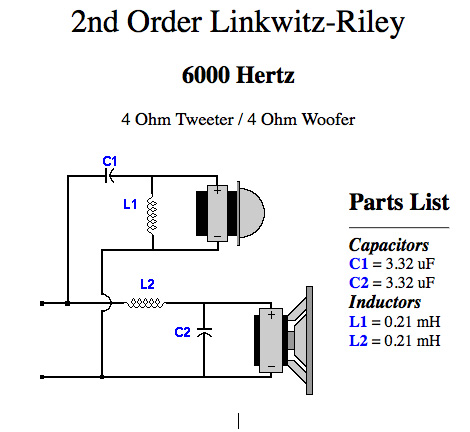
6K 2nd Order Crossover schematic. |

The 2db L-Pad Attenuator Schematic. |
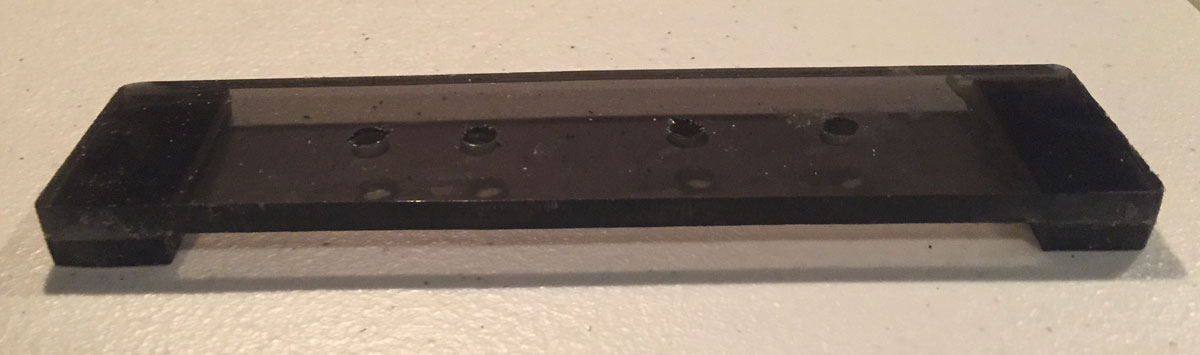
The base plate for the crossover showing mounting holes and spacer pads. |
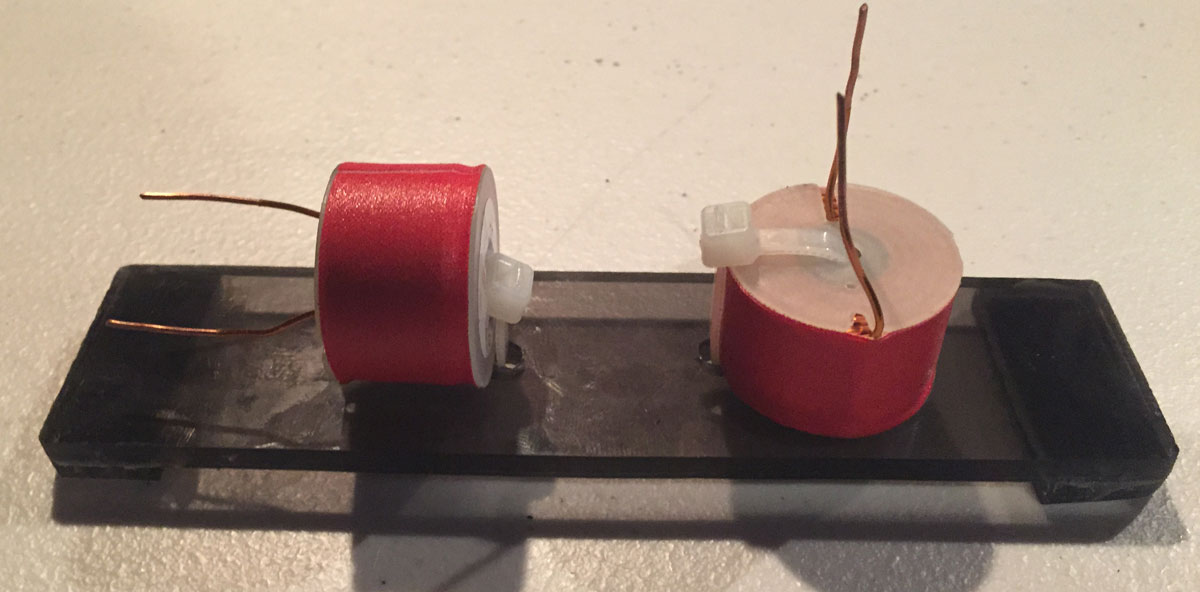
The inductors mounted at 90 degrees to each other to prevent crosstalk. |
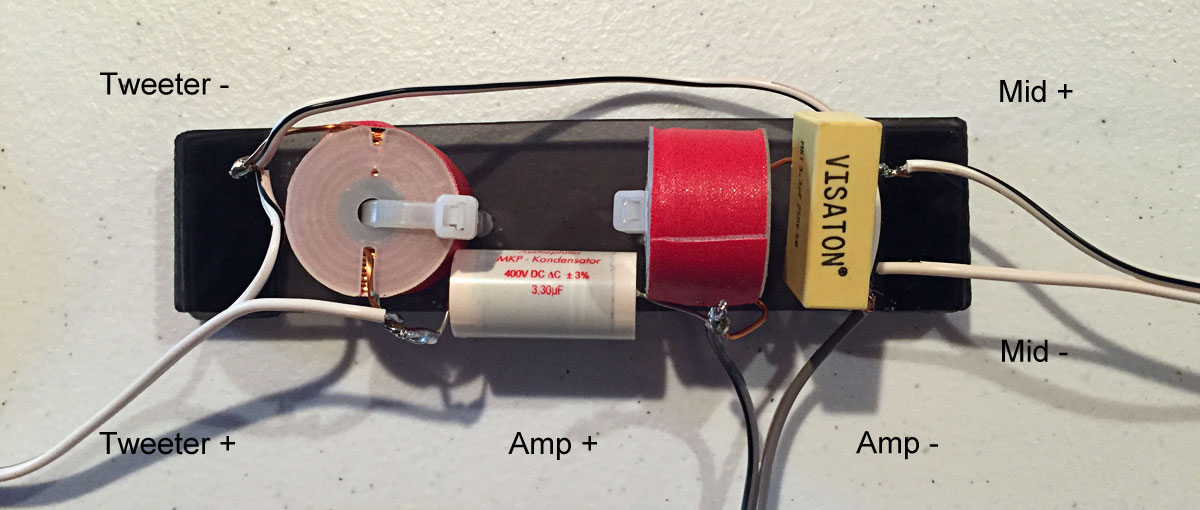
Wired up and ready to mount. |
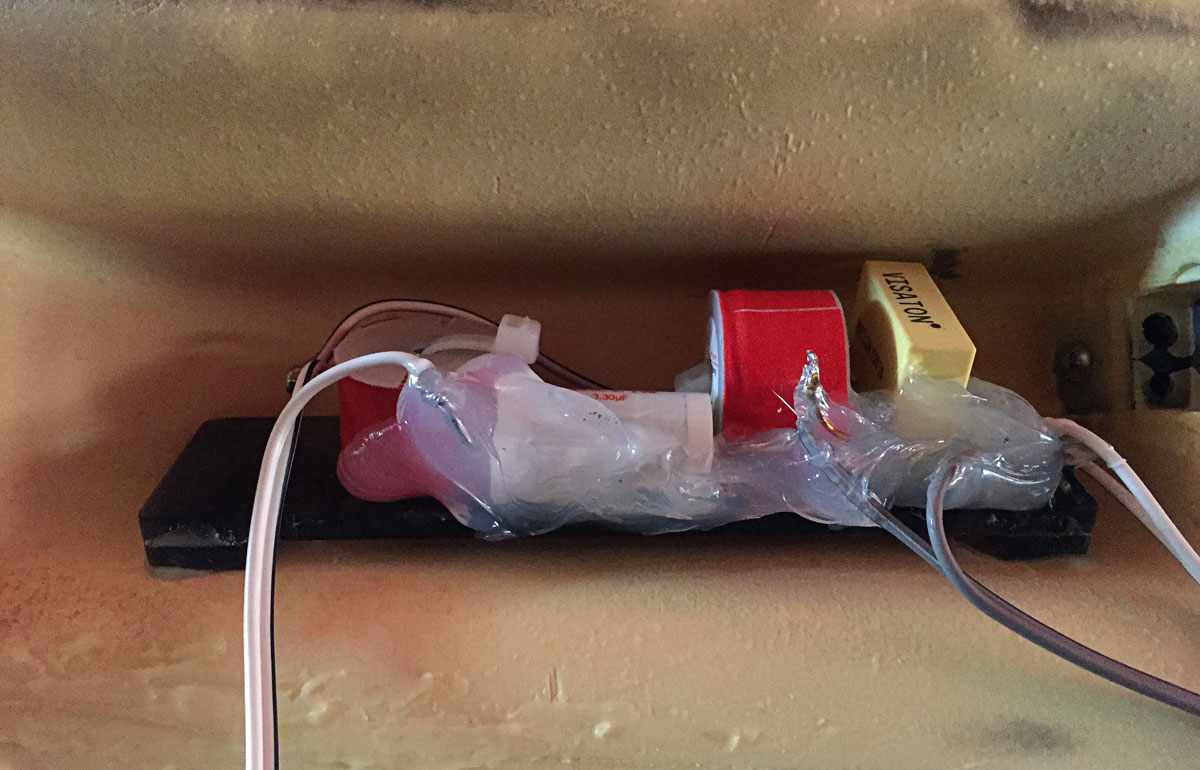
The crossover glued in place in the back of the door card and the components supported with a good squirt of silicone. |
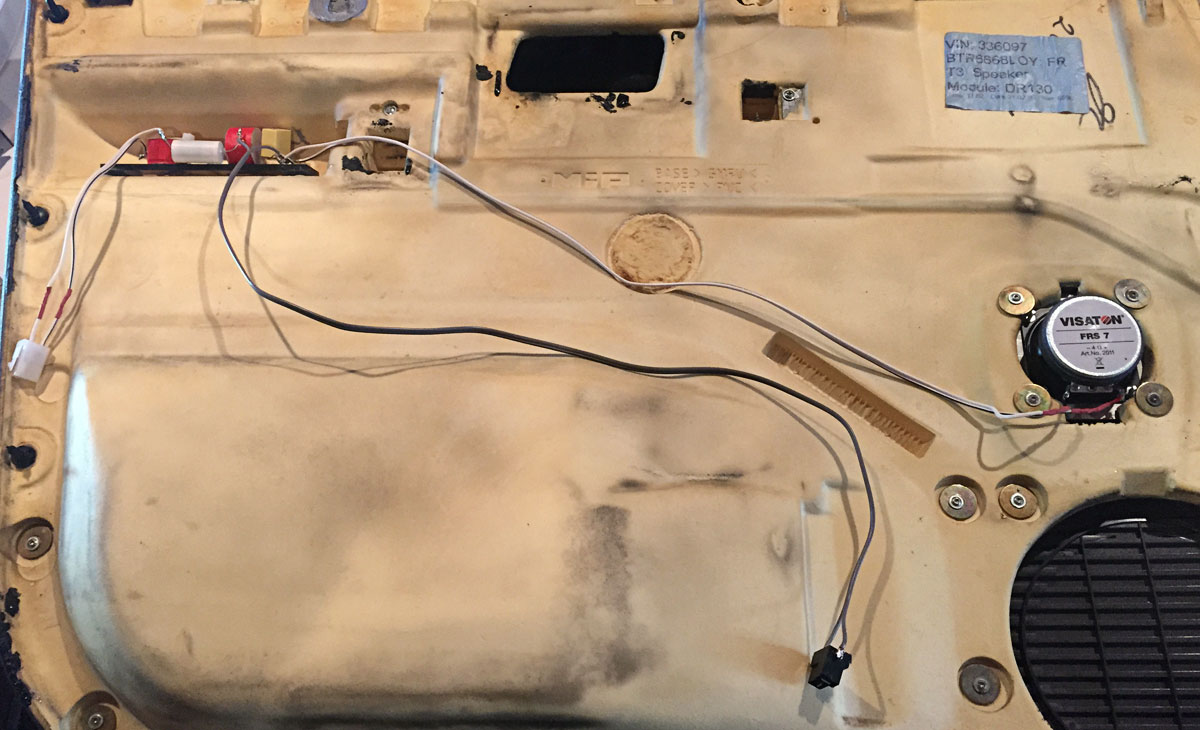
Wider shot of the back of the door card showing wiring. |
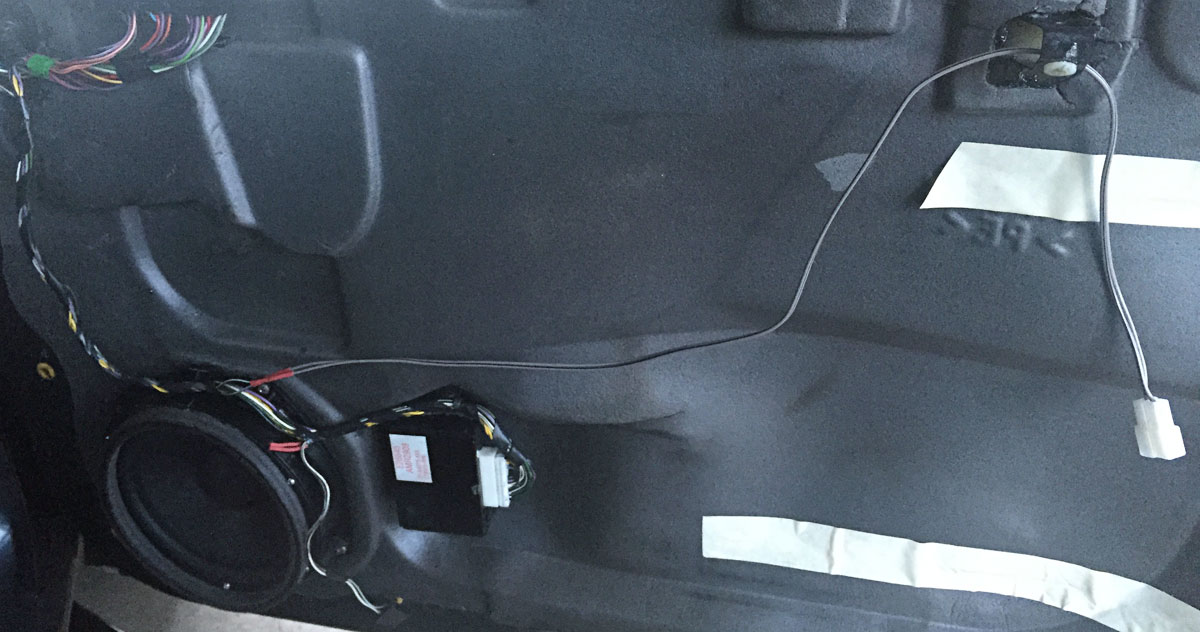
A view of the inside of the door after the wiring mod. It is just a matter of snipping the feed to the tweeters and wiring a connector to them. |